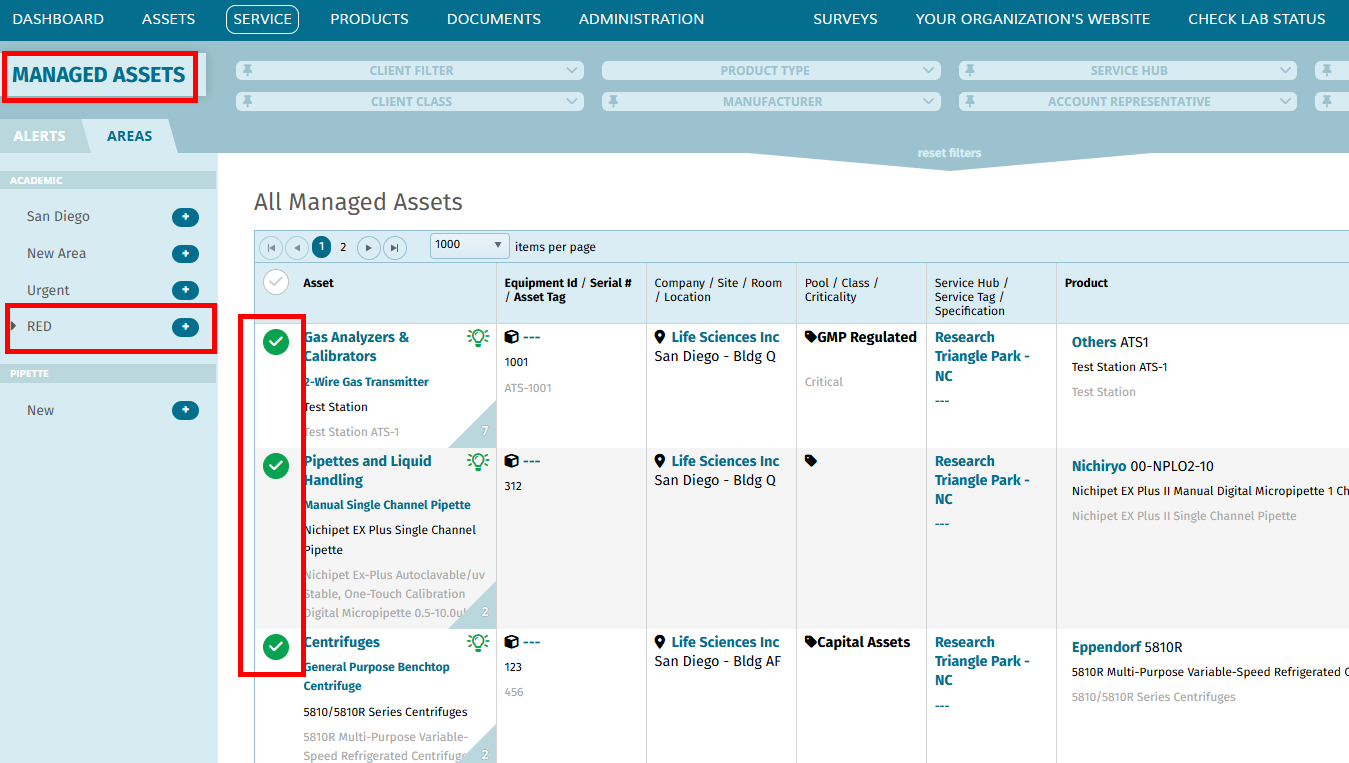
Areas are used as folders/filters for organizing assets, documents, products, inventory, and services. You can use the same Area Classification for multiple applications or just one. Each area classification creates a filter category, while the folders and sub-folders can be created for added granularity.
These steps guide users through Configuring and Managing Classification Areas.
Step-by-Step Instruction Creating Classification Areas.
- Click "Administration" from the main menu at the top of the screen.
- On the "Administration" page, click "Configuration" in the left bar.
- In the Configuration section, select "Classification Areas."
- Click the "Add Area Group" button.
- The selected area group is set to "New"
- In the "Area group name" field, enter the name
(ex: Academic). - Click "Update Area Group."
- A confirmation message, "Classification successfully added," is displayed.
- Click "Add New Area" and enter
(Red)in the "Area Name" field. - Click "Save" to create the area.
- Set additional parameters:
- Select color (e.g., yellow) next to "Area group name."
- Select checkboxes:
- "Allow assignment to more than one area (treat areas as 'tags' instead of 'folders')."
- "Display area in the assigned objects."
- "View/filter asset areas in work orders."
- "Allow assignments of Assets, Client Assets, Service Requests, Work Orders."
- Click "Update Area Group" to save the settings. A confirmation message, "Classification successfully updated," appears.

Filter Areas in Asset Manager
- Go to Assets > Asset Manager and open the "AREAS" tab to see the created area.
- Click the circle checkbox next to the assets that should be added to the created area.
- Click the + or number to the right of the created area on the left side. Click on the area to see the assets added.


You can do the same by going to "Service" > "Managed Assets"

Filtering Work Orders by Asset Areas in Qualer
Access Work Orders Page
- Navigate to "Service" in the main menu, then select "Work Orders."
Search for Work Orders by Asset Area
- Use the search bar to enter a specific work order number if needed.
- In the top blue header, click the "Area" filter and choose the asset area (e.g.,
(Red)) you want to filter by. - This will display only the work orders associated with that area, with area tags shown in the "Order # / Submitted On" column.
Clear the Area Filter
- To reset the view and show all work orders, click the "x" next to the selected area name in the "Area" filter.
Verify Synchronization
- Click any filtered work order to open the "Service Order" page.
- Check that the asset area is displayed in the top left, confirming synchronization between assets and work orders.


