Change Management
Print
Modified on: Wed, 31 Jul, 2024 at 1:31 PM
Steps to Configure Change Management
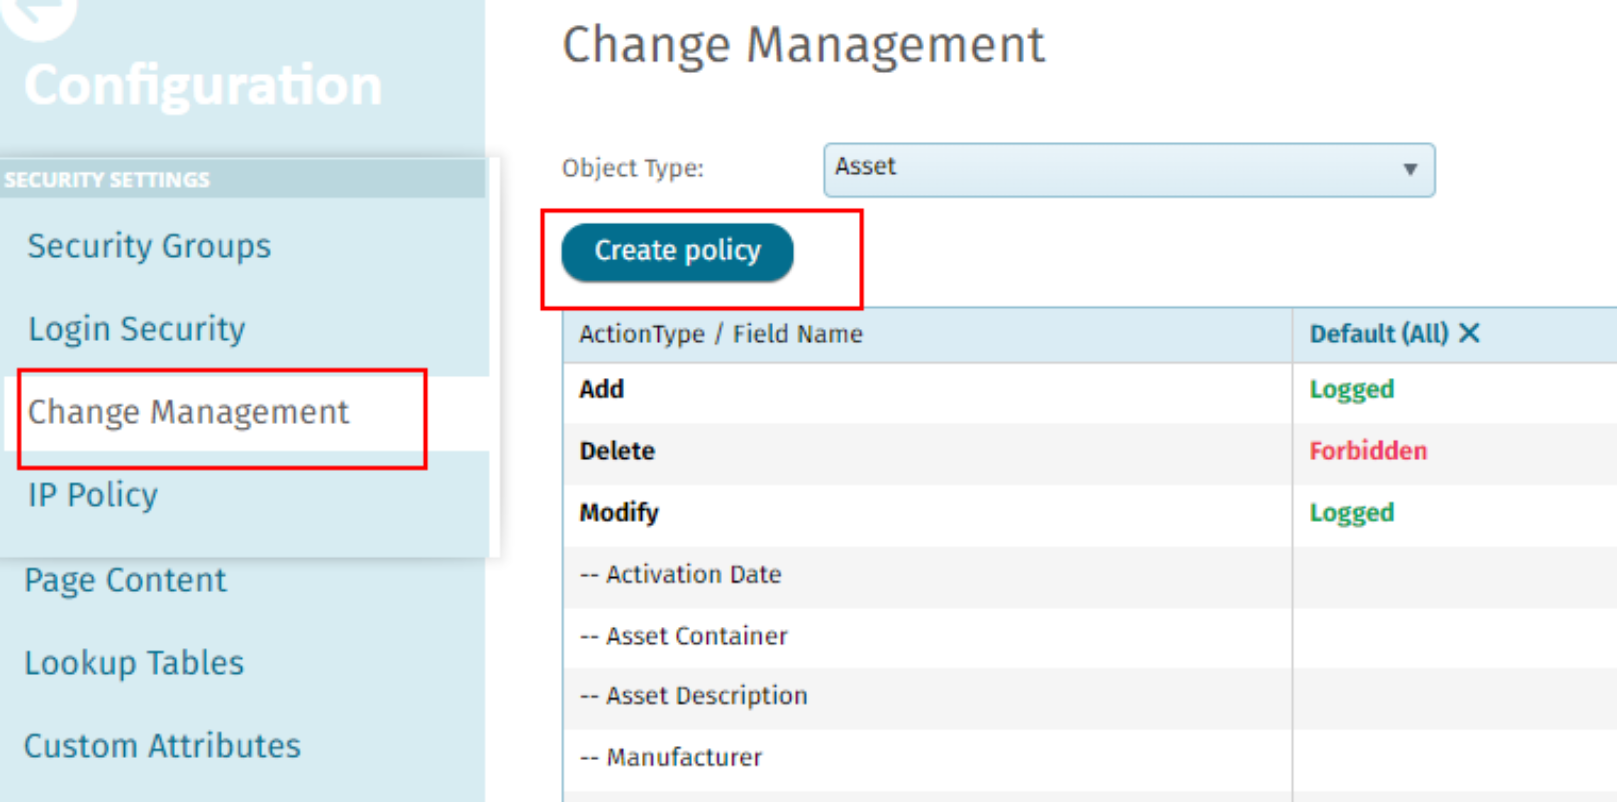
- Navigate to Change Management: Administration > Security Settings > Change Management.
- Note: If you do not see this tab, contact support at (858) 223-1560 or support@qualer.com.
Create a Company Policy
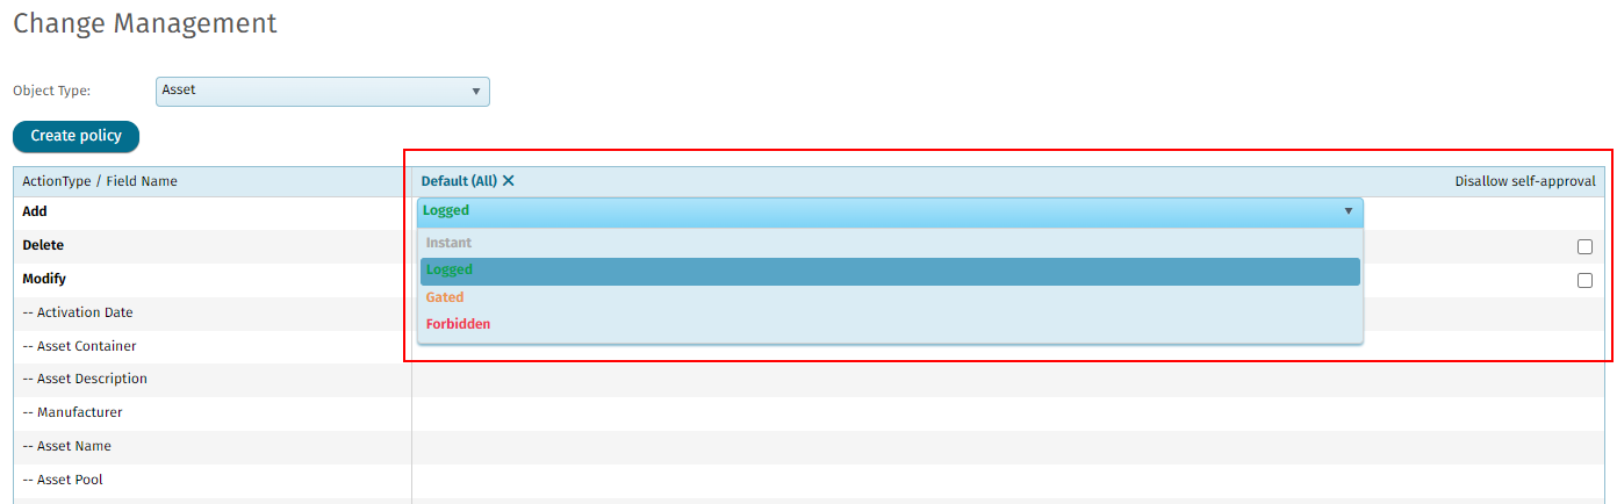
Configure Change Options
- By default, the options will show as Instant. Click on the word to change:
- Instant: Change is automatically made.
- Logged: Change is tracked and shown in the Changes tab of the asset.
- Gated: Change must be approved by a company administrator before it is made.
- Logged + Reason: Change is tracked and requires a reason from the user.
- Gated + Reason: Change must be approved and requires a reason from the user.
- Forbidden: No users can make any changes.
- Custom: Different rules can be set for each asset information piece.
- "Disallow self-approval" is a feature that can be used in the Change Management. If any changes need to be reviewed by a different user. Enable the "Disallow self-approval". User cannot approve their own work, ensuring that all changes or submissions are reviewed by at least one other person.
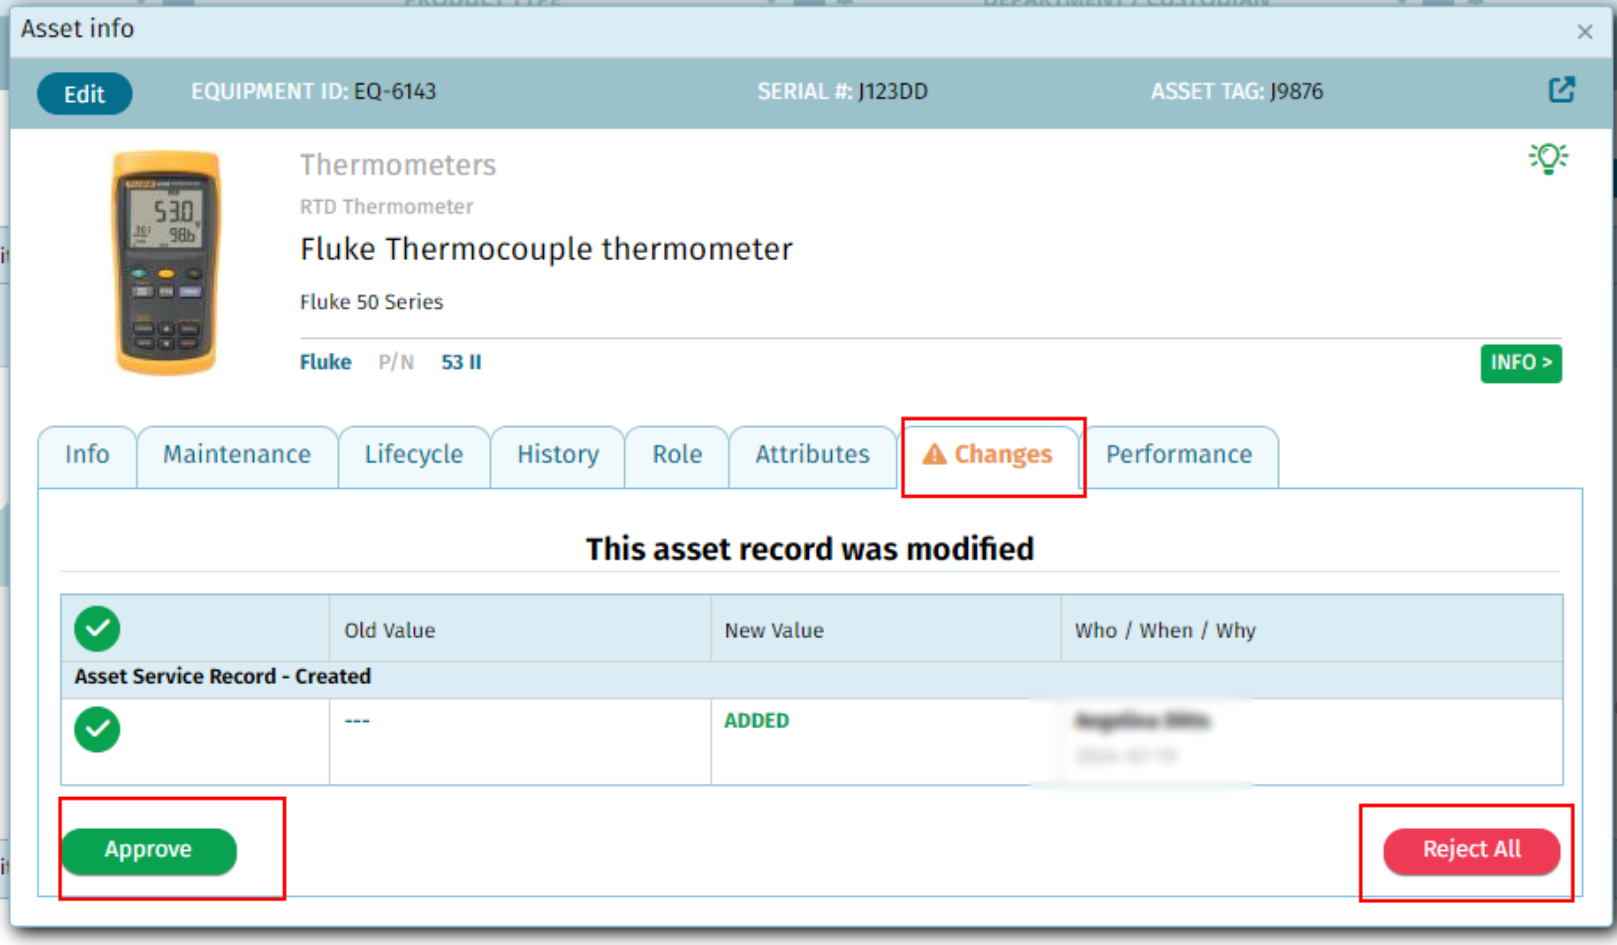
Approve Changes
- Changes can be approved by clicking on an option in the Asset Changes section of the asset manager, then going to the Changes tab of the asset and approving or rejecting the modifications.
- Note: Company Administrators do not need approval for changes they make.
View Changes Made to an Asset
- Click on Asset > Asset Manager from the top column.
- Select the number in blue.
- Go to the Changes tab to view the changes made.

Did you find it helpful?
Yes
No
Send feedback Sorry we couldn't be helpful. Help us improve this article with your feedback.