An inventory manager is a powerful tool that can help businesses streamline operations and improve overall productivity. Qualer is excited to let you take a closer look at what some standard workflows may look like in the highly anticipated Inventory application.
Scenario
A biotech lab receives a shipment of 4 pipettes. Upon arrival, the lab manager checks each pipette against the purchase order, ensuring the correct volume range and brand. The lab manager then records this shipment into Qualer Inventory.
Step 1. Create Inventory Item
Start by creating the newly received pipette as an inventory item(s).
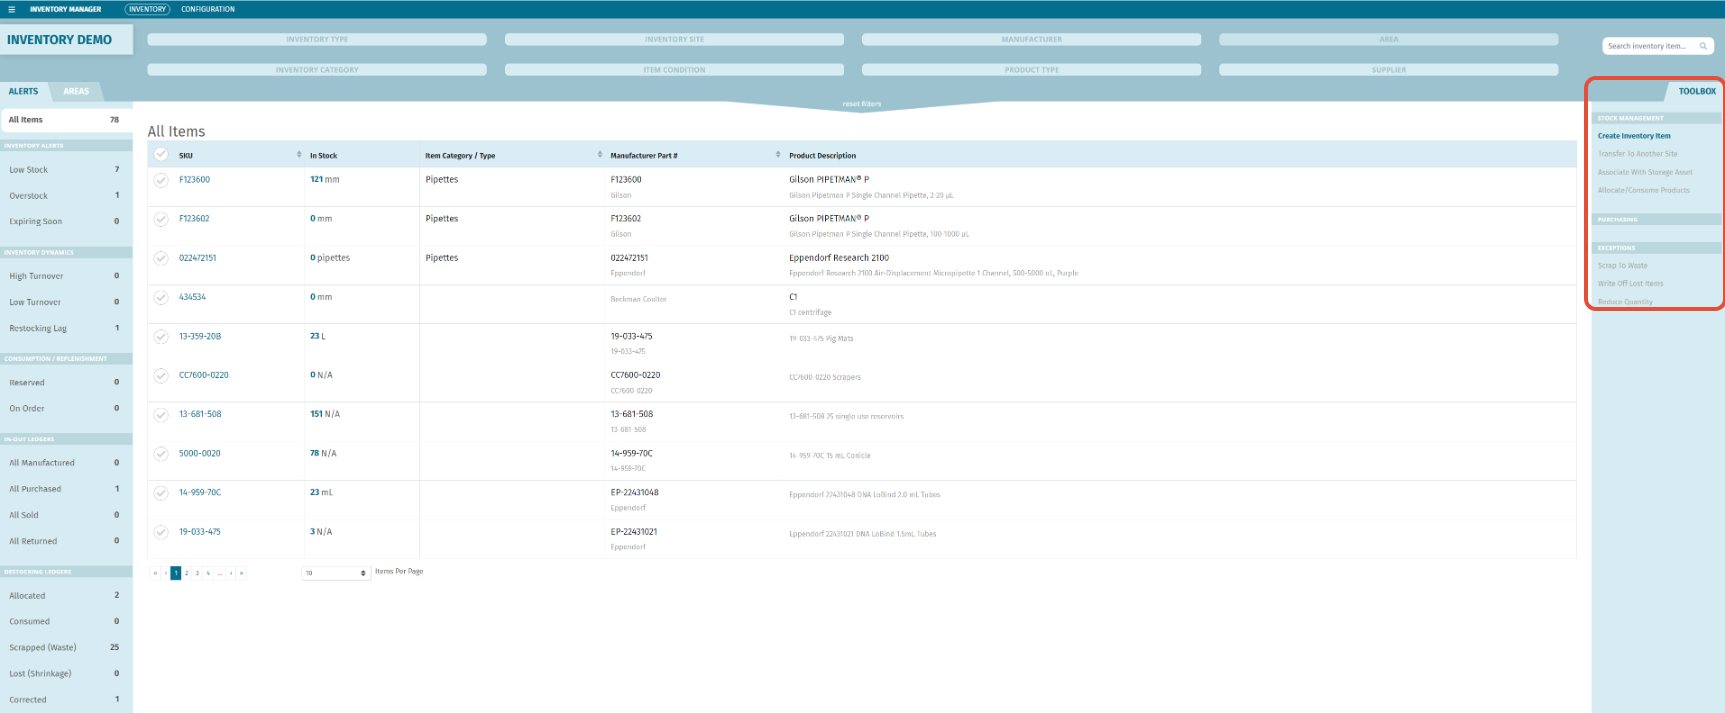

To create a new inventory item, please use the "Create Inventory Item" action located in the toolbox on the right-hand side.

Search, filter, and select the product that you wish to start tracking inventory for.
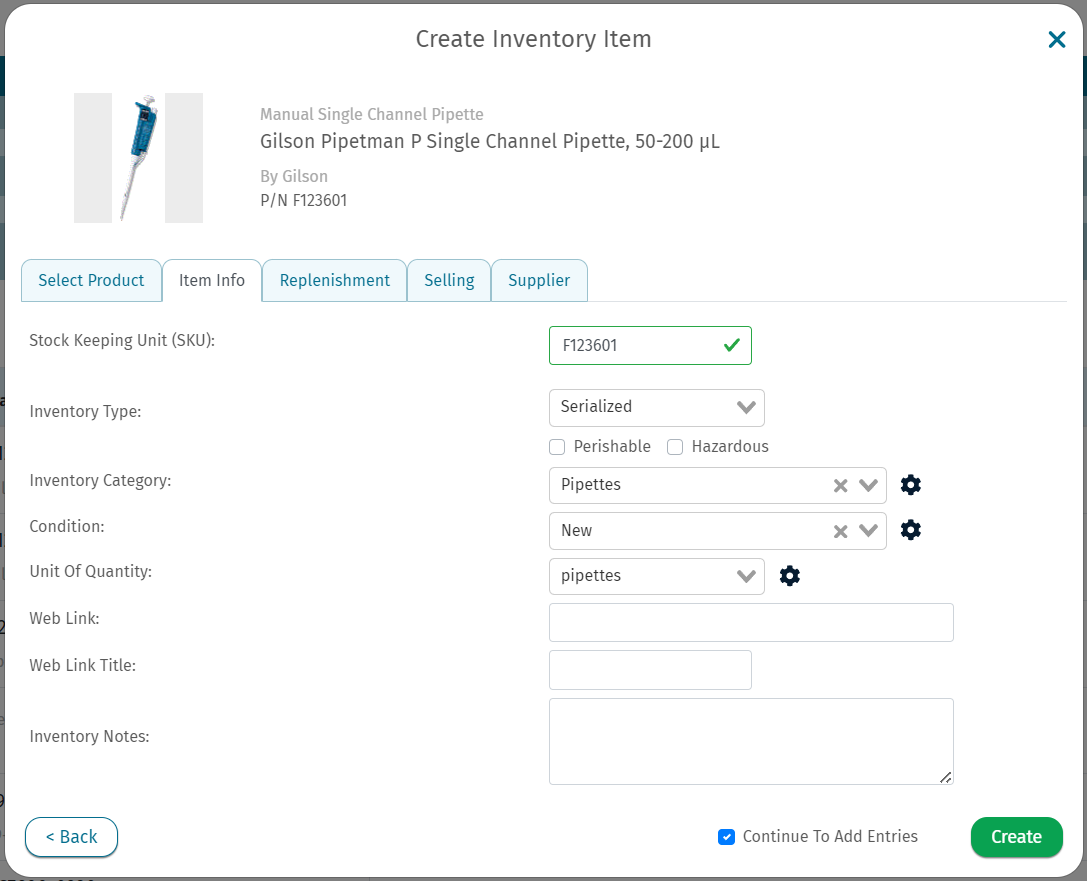
Fill out basic information about the inventory item. Customize categories, conditions, and units of quantity.
Select between 3 Inventory Types:
1. Bulk - Large quantities, not differentiated individually.
2. Serialized - Individual items with unique serial numbers.
3. Liquids - Items stored in liquid form within containers.
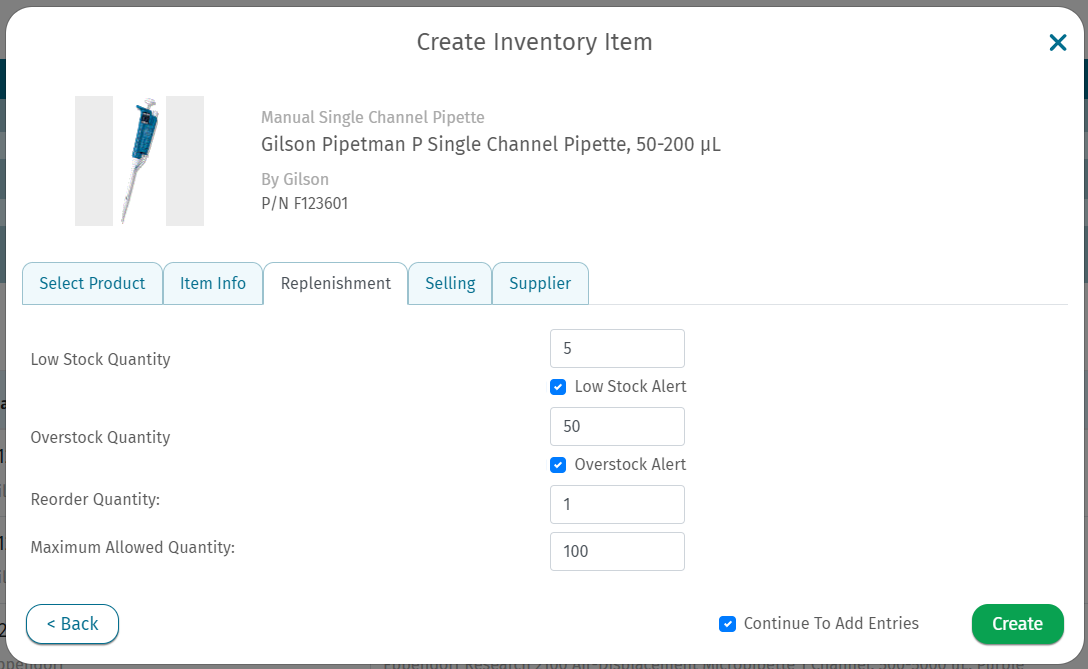
Define Replenishment criteria to see inventory stock alerts.

Keep track of pricing and ordering information.
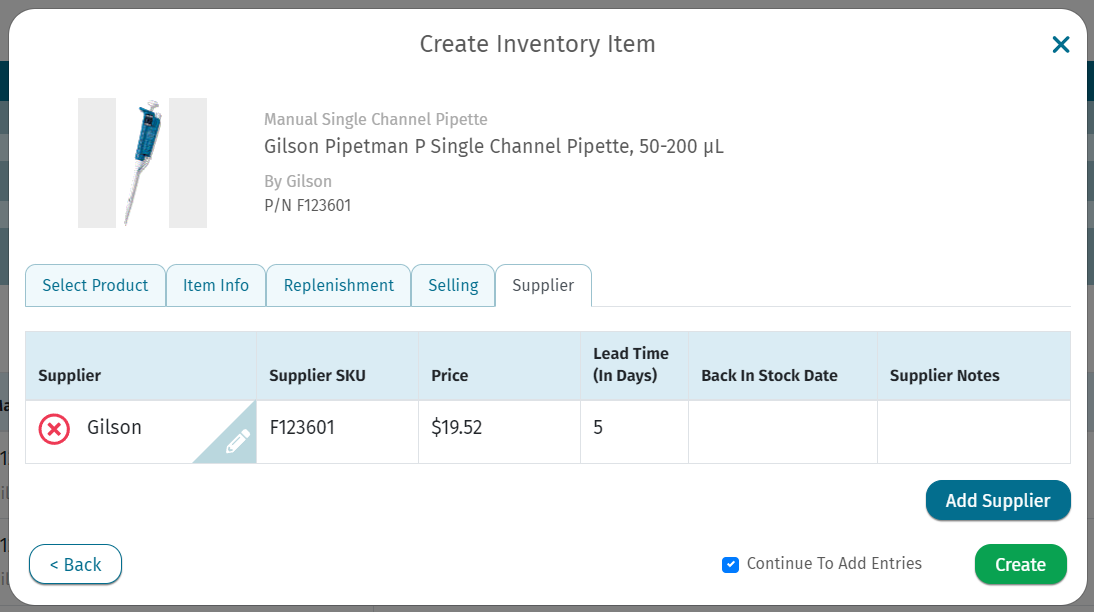
Store additional pricing and ordering details across different suppliers.
Step 2. Add To Inventory
Now that we have an item set up, we are able to update its stock/quantity.

Update stock levels based on your purchase order.
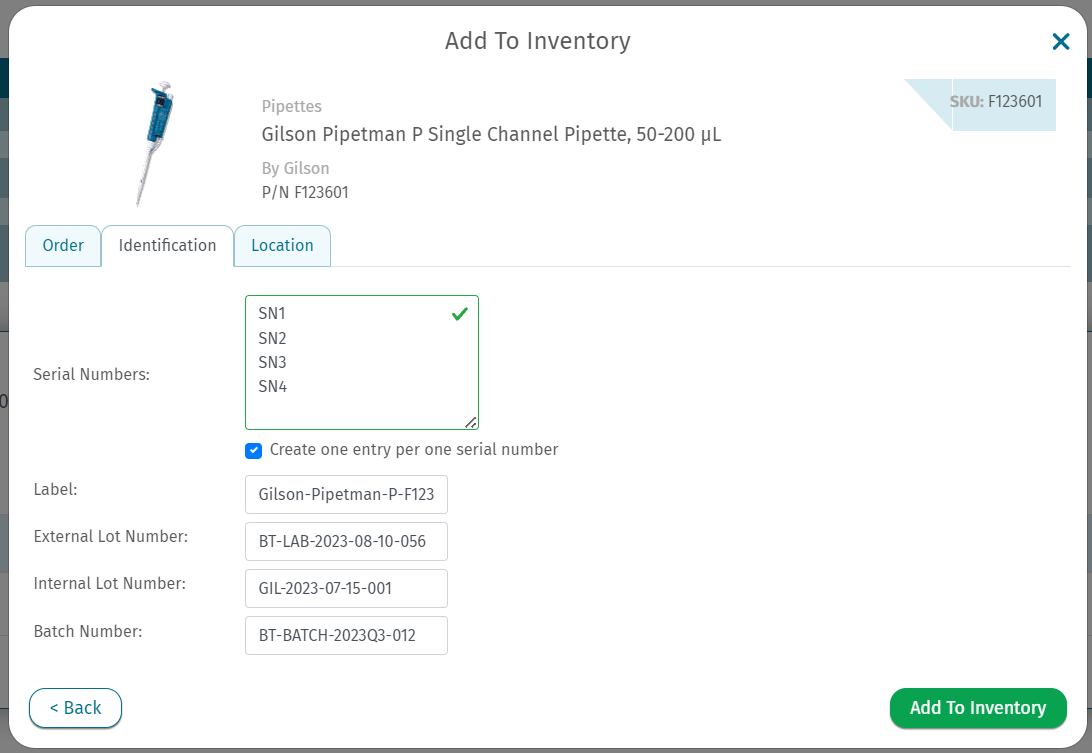
Note: When serialized, the item quantity is always 1.
Catalog each pipette precisely: Assign labels, lot numbers, batch details, and multiple serial numbers for meticulous inventory tracking.

Allocate items to a specific site, room, cabinet, shelf, and bin for effortless retrieval and streamlined inventory tracking.
Assign items to specific storage assets. This aids in pinpointing potential risks when equipment issues arise, helping ensure appropriate follow-up actions.
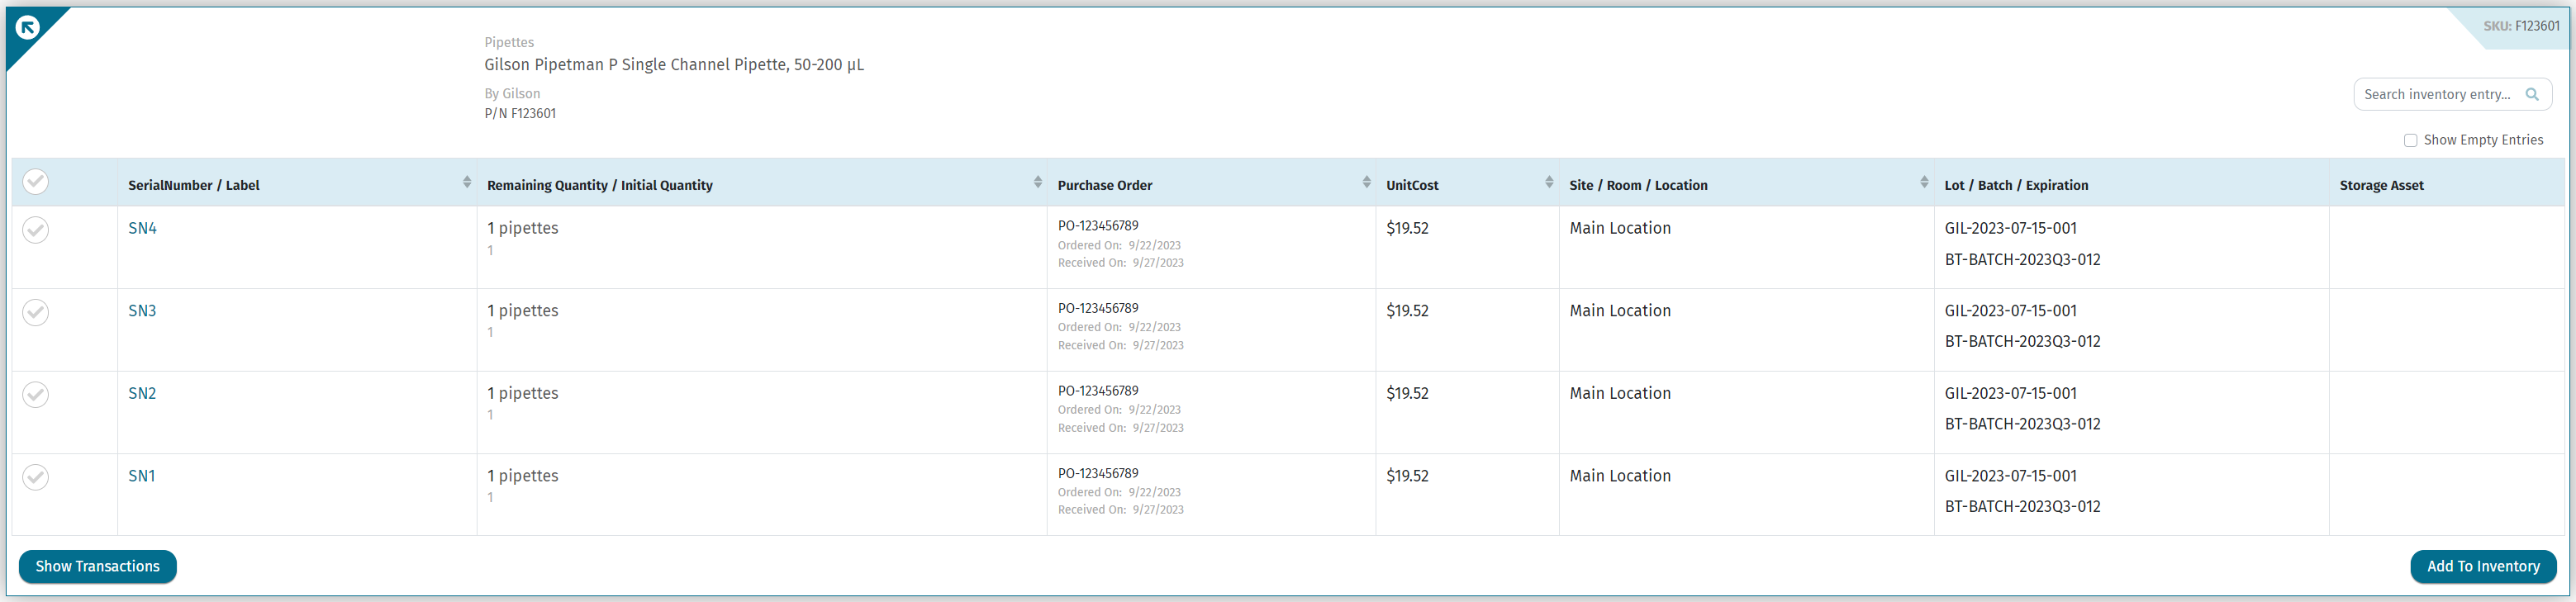
After adding to inventory, we are then able to view/search for the current quantity of any such inventory items.
Step 3. Deducting (removing) from Inventory
Inventory management is not just about tracking what comes into a storage facility; it's equally vital to monitor how items leave or change within that space. As products move out or are re-evaluated, they typically get classified into different destocking ledgers to provide clarity on their status. Here's Qualer Inventory's destocking ledgers:
- Allocated: Items set aside for specific purposes or orders.
- Consumed: Items used up in business operations or processes.
- Scrapped (Waste): Damaged or outdated items designated for disposal.
- Lost (Shrinkage): Items missing due to theft, misplacement, or errors.
- Corrected: Adjustments made to rectify inventory record discrepancies.
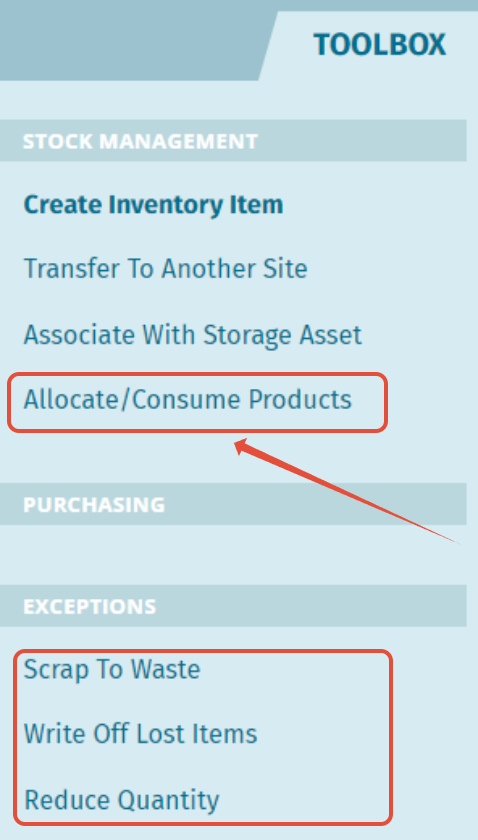
To move inventory to one of these ledgers, simply select the inventory item and select your desired action from the Toolbox.

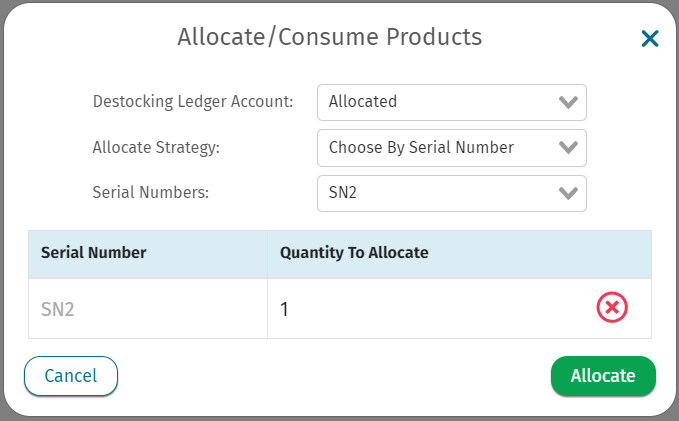
Choose an allocation strategy that fits your needs.
Having mastered adding and removing inventory, we can now accurately track all inventory movement across different ledgers. View comprehensive inventory transaction history, providing rich and clear insight into every item's journey.